How to Set Custom Hotkeys (Keyboard Shortcuts) in Advanced Auto Clicker
Advanced Auto Clicker provides robust hotkey support, allowing you to control its core functions (Start Clicking, Stop Clicking, Pick Location) without needing to interact directly with the application window. This is incredibly useful when you're working in another application or playing a game full-screen.
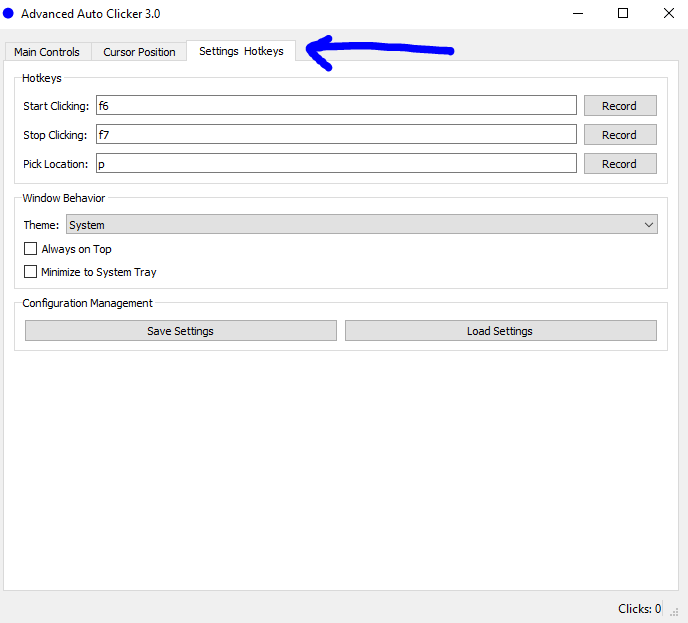
Default Hotkeys are:
- Start Clicking: F6
- Stop Clicking: F7
- Pick Location: P
Here’s how you can easily customize these hotkeys to your preference:
Steps to Change Hotkeys:
- Launch Advanced Auto Clicker.
-
Navigate to the "Settings & Hotkeys" Tab. You'll find this tab clearly labeled at the top of the application window. Clicking it will reveal various configuration options.
-
Locate the "Hotkeys" Section. Within this tab, there's a dedicated "Hotkeys" group box. Here you'll see the current key assignments for "Start Clicking," "Stop Clicking," and "Pick Location."

-
Click the "Record" Button. For the specific action whose hotkey you wish to change (e.g., "Start Clicking"), click the "Record" button located to its right.
The text on the button will change to "Press key...", indicating it's now listening for your input. The button will also become temporarily disabled.

-
Press Your Desired Key or Key Combination. Now, press the key (e.g., 'F10') or key combination (e.g., 'Ctrl + Shift + A') on your keyboard that you want to assign to this action. Advanced Auto Clicker will capture this input.
Note: While Advanced Auto Clicker supports various key types, for global hotkeys (that work even when Advanced Auto Clicker is not the active window), function keys (F1-F12), or combinations with modifiers (Ctrl, Alt, Shift) + a letter/number are generally most reliable and less likely to conflict with typing in other applications. Single character keys might trigger unexpectedly if you are typing while the hotkey listener is active.
- Hotkey Updated Confirmation. Once a valid key is pressed, the text field next to the "Record" button will update to display your newly assigned hotkey. The "Record" button will revert to its original "Record" text and become enabled again. The Start/Stop buttons on the "Main Controls" tab will also dynamically update to show the new hotkey assignments.
- Repeat for Other Hotkeys (If Desired). You can follow the same process (Steps 4-6) to change the "Stop Clicking" or "Pick Location" hotkeys.
- Settings are Auto-Saved (Usually). Your new hotkey settings are generally saved automatically when they are changed. They are also saved when you close Advanced Auto Clicker properly. For added assurance, or if you've changed other settings, you can manually save your entire configuration by clicking the "Save Settings" button in the "Configuration Management" section of the "Settings & Hotkeys" tab.
Tips for Choosing Effective Hotkeys:
- Ease of Access: Choose keys or combinations that are comfortable and easy for you to reach quickly.
- Avoid Conflicts: Be mindful of hotkeys already used by your operating system (e.g., Ctrl+C, Alt+F4) or other applications you use frequently. Choosing unique combinations will prevent unintended actions.
- Simplicity vs. Uniqueness: Simple F-keys are easy but might be used by some games. Modifier + Key combinations (e.g., Ctrl+F9) are more unique but slightly more complex to press.
- Test Your Hotkeys: After setting new hotkeys, test them to ensure they work as expected and don't interfere with other software.
By customizing your hotkeys, you can significantly enhance your efficiency and make Advanced Auto Clicker an even more integrated and seamless part of your digital workflow!